Keep track of your classes
When you first access your classes, you will either see a screen with two columns - on the left you will find the classes that are available to you, and on the right you will see those classes you are scheduled to take. If your school or teacher have entered classes for your school, you will see them in the left-hand column. If they haven't, don't worry - you can enter them yourself too.
Schedule existing classes
To schedule your existing classes all you need to do is drag the courses from the left hand column, to the appropriate year on the right. You can see the layout of the course planner in Figure 1 below.
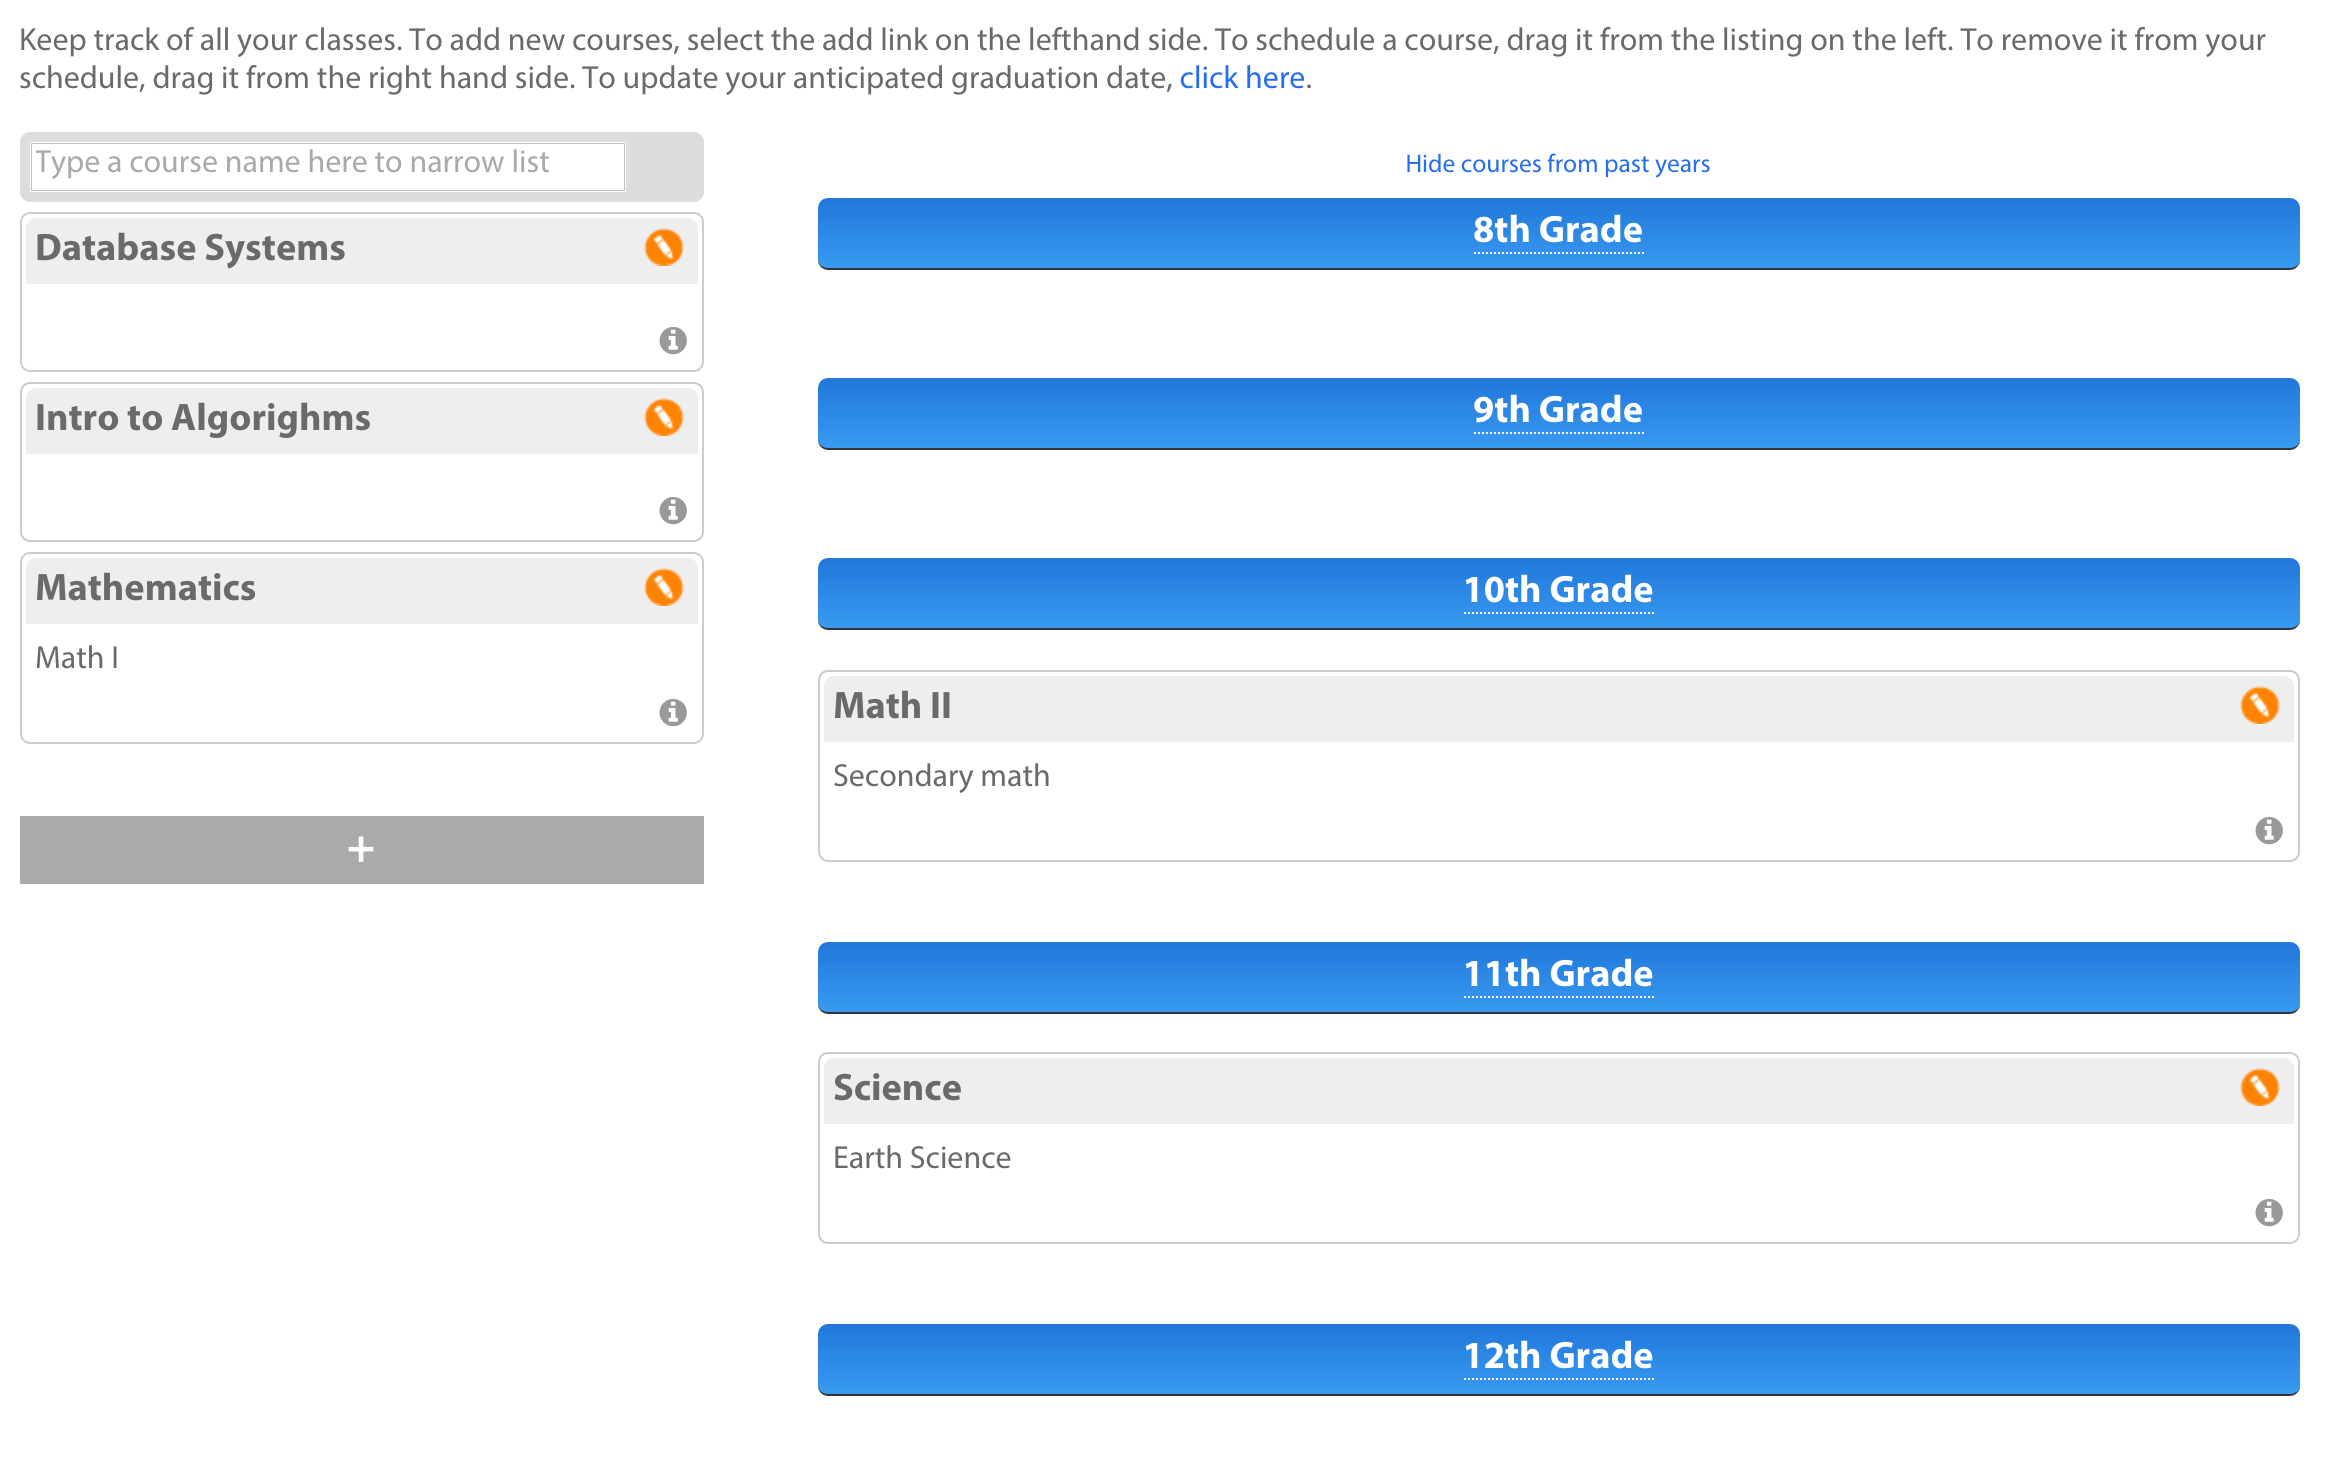
Figure 1
Create your own
To Create your own course, click on the + in the bottom left of the screen as seen in Figure 1 above. This will bring up a popup where you can enter information on the class, including:
- Course Name: This would be the name you refer to the course as
- Subject Area: This is a listing of common subject areas like Mathematics, Science, etc...
- Level: This is how advanced the subject is, for example if you are freshman in high school - most of your classes would probably be introductory.
- Prerequisite: Are any other classes required before you can take this one?
- Description: What will you learn in this class? What tasks will you perform? You can describe them here.
Once you have completed adding the course, you can click save and schedule it the same way as described above.
Removing an item from the schedule
To remove an item from the schedule, simply drag the course back from the right hand column into the left.